Commercial Disclosure Statement: Glide Ebike operates as both a content publisher and retailer of electric bicycles and cycling products. This content contains products sold through our store.
Financial Relationship: We earn revenue from purchases made on products contained within this article. However, products featured have passed our safety and quality evaluation (certifications, materials, design) before commercial consideration.
Editorial Standards: While we endeavor to provide accurate, helpful information drawn from genuine experience with e-bikes and maintenance practices, readers should independently verify information and compare multiple retailers before making purchase decisions.
Table of Contents
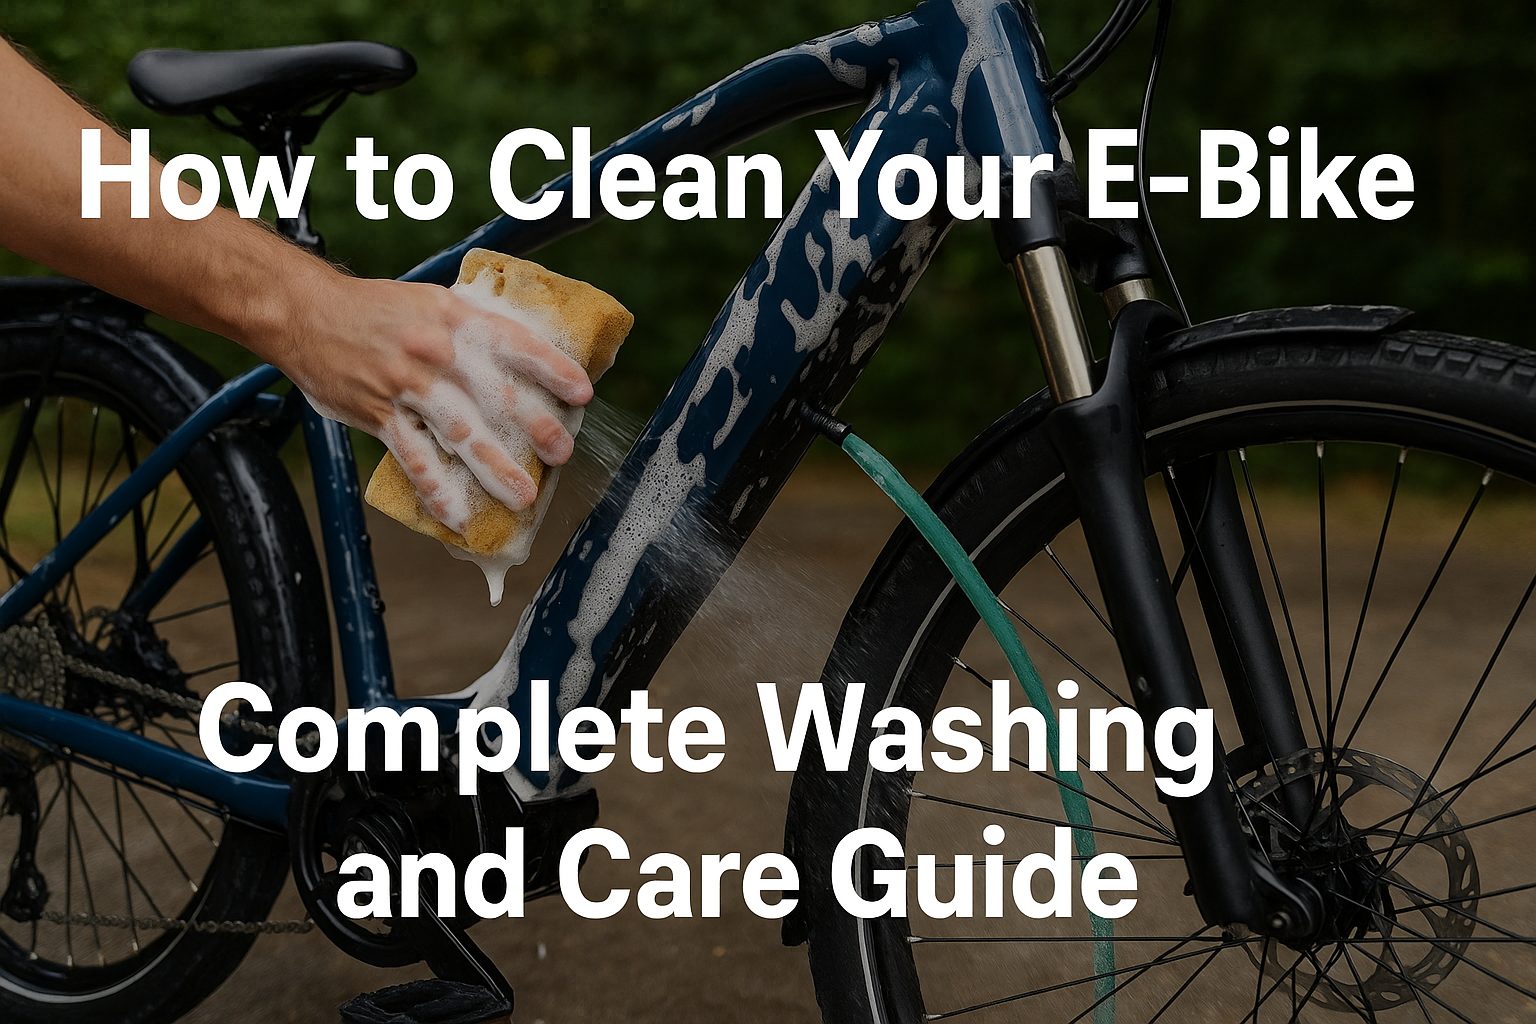
How to Clean Your E-Bike: Complete Washing and Care Guide
How to Clean Your E-Bike: Complete Washing and Care Guide
Bottom Line Up Front
Regular cleaning extends your e-bike's lifespan and maintains peak performance. After washing hundreds of e-bikes over the past decade, I've learned that proper cleaning isn't just about aesthetics—it's preventive maintenance that saves you hundreds in repairs. Never use high-pressure washers on electrical components, always dry thoroughly, and establish a consistent cleaning routine based on your riding conditions. A well-maintained e-bike not only performs better but also retains significantly more resale value.
I still remember the first time I pressure-washed my e-bike back in 2015. Within a week, my display was glitching, and moisture had seeped into the battery connection. That expensive mistake taught me everything about what NOT to do when cleaning an electric bike.
Over ten years of daily e-bike riding through rain, mud, and dusty trails have taught me that cleaning isn't optional maintenance—it's essential. A properly cleaned e-bike performs better, lasts longer, and saves you money on premature component replacement.
Why Proper E-Bike Cleaning Matters
Unlike traditional bicycles, e-bikes have sensitive electrical systems that require special care. Dirt and grime aren't just cosmetic issues—they cause real damage to your investment.
The chain and drivetrain collect abrasive particles that wear down components faster. I've seen chains that should last 3,000 miles fail at 800 miles simply because riders never cleaned them. Battery contacts corrode when exposed to moisture and road salt, leading to connection issues and reduced range.
Brake performance suffers dramatically when pads and rotors accumulate oil and dirt. Last month, I encountered a rider whose disc brakes had lost 40% effectiveness simply from accumulated grime—a serious safety hazard they didn't even realize existed.
E-Bike Cleaning Schedule by Usage
After Every Ride
Quick wipe-down of frame
Remove visible mud/debris
Check for damage
Inspect tire pressure
Weekly (Regular Riders)
Full exterior wash
Chain cleaning & lube
Brake inspection
Battery contact check
Monthly Deep Clean
Complete drivetrain degrease
Spoke and wheel detailing
All bolts torque check
Electrical connection inspection
Seasonal Maintenance
Professional inspection
Bearing service
Cable replacement check
Full protective wax application
Essential Cleaning Supplies and Tools
Having the right tools makes cleaning efficient and safe. I've tested dozens of products over the years, and these are the essentials that actually work.
Your Complete E-Bike Cleaning Kit
🧽
Soft Sponges
Non-abrasive for frame
🪣
Two Buckets
Wash & rinse method
🧴
Bike-Specific Soap
pH-balanced formula
🖌️
Detail Brushes
Various sizes for tight spots
⛓️
Chain Cleaner
Degreaser & brush
🧻
Microfiber Cloths
Lint-free drying
💧
Garden Hose
Low-pressure rinse
🛢️
Chain Lubricant
Wet or dry formula
Pro Tip from 10 Years Experience: Invest in a proper chain cleaning device. I resisted buying one for three years, thinking a rag would suffice. Once I finally got one, my chains lasted twice as long. The Park Tool CM-5.3 or similar devices pay for themselves in extended component life.
Step-by-Step E-Bike Cleaning Process
This is the exact method I've refined over thousands of cleaning sessions. Following this sequence prevents water from entering sensitive areas and ensures thorough cleaning without damage.
Complete Cleaning Process
1
Pre-Cleaning Preparation
Remove the battery and store it safely indoors. Cover the display with a plastic bag secured with tape—even "waterproof" displays can fail. Check all electrical connections and cover any exposed ports. Position your bike on a workstand or flip it upside down if you're cleaning the drivetrain.
2
Initial Rinse (Low Pressure Only)
Use a garden hose with gentle water pressure to rinse off loose dirt. Never aim directly at bearings, the motor, battery compartment, or electrical connections. Start from the top and work downward, letting gravity help remove debris. This initial rinse prevents scratching during the scrubbing phase.
3
Apply Cleaning Solution
Mix bike-specific soap in your wash bucket according to instructions. Apply with a soft sponge to the frame, working in sections. Use detail brushes for hard-to-reach areas around the motor casing, battery mount, and cable guides. Never let soap dry on the frame—work in shaded areas on hot days.
4
Deep Clean the Drivetrain
This is where most riders cut corners. Apply degreaser to the chain, cassette, and chainrings. Use a chain cleaning tool or stiff brush to scrub thoroughly. The cassette requires individual attention between each cog. On Bafang and Shimano motors, be careful around the motor housing seal—avoid forcing water into the gap.
5
Clean Wheels and Brakes
Scrub tire treads with a stiff brush to remove embedded debris. Clean rims thoroughly, especially the brake track on rim-brake bikes. For disc brakes, use isopropyl alcohol on rotors—never soap, which leaves residue. Inspect brake pads for embedded debris and contamination.
6
Final Rinse and Inspection
Rinse thoroughly from top to bottom with low-pressure water. Check that all soap residue is removed—leftover soap attracts dirt. Inspect frame for any damage you might have missed. Look for loose bolts, cable fraying, or suspicious noises when spinning wheels.
7
Thorough Drying
This step is critical and often rushed. Use microfiber cloths to dry every surface, paying special attention to battery contacts, charging port, and display connections. Compressed air helps remove water from tight spaces. Let the bike air dry for 30 minutes before reinstalling the battery.
8
Lubrication and Protection
Apply fresh chain lubricant appropriate for your conditions—wet lube for rainy climates, dry lube for dusty areas. Wipe excess immediately. Lightly lubricate pivot points and derailleur pulleys. Apply frame protectant or wax to vulnerable areas. Clean and apply dielectric grease to battery contacts.
Common Mistake I Made Early On: I used to reinstall the battery immediately after cleaning, thinking surface drying was enough. Three corroded battery contacts later, I learned that patience saves money. Always wait at least 30 minutes for complete air drying, especially around electrical connections.
Critical Do's and Don'ts
These guidelines come from painful experience and watching countless riders make preventable mistakes.
✓ Always Do These
Remove battery before cleaning
Use bike-specific cleaning products
Dry thoroughly before storage
Lubricate chain after every wash
Check torque on bolts monthly
Inspect for damage during cleaning
Cover display and connections
Use low water pressure only
Clean in shaded area
Test brakes after cleaning
✗ Never Do These
Use pressure washers or car washes
Spray water directly at motor
Submerge any electrical components
Use harsh household cleaners
Forget to remove battery first
Let soap dry on frame
Over-lubricate chain (attracts dirt)
Clean in direct sunlight
Skip drying electrical contacts
Ignore squeaky or grinding noises
Special Considerations by E-Bike Type
Different e-bike styles require slightly modified cleaning approaches based on their design and component exposure.
Folding E-Bikes
Pay extra attention to hinge points where dirt accumulates. These areas need careful cleaning and light lubrication to prevent premature wear. The ENGWE EP-2 Pro and similar folding models have tight spaces around the folding mechanism that require detail brushes.
Mountain E-Bikes
Suspension components need special care—avoid spraying directly at fork seals and rear shock bushings. After muddy rides, these bikes require immediate cleaning to prevent dirt from working into sensitive bearing areas. Use frame protectors on the downtube where rock strikes occur.
Fat Tire E-Bikes
Those wide tires collect massive amounts of debris in the tread. Use a stiff brush to clean between the knobs thoroughly. The XDC600 Fat Tire and similar models benefit from checking spoke tension during cleaning, as the wider rims put different stress on the wheel.
Cargo E-Bikes
Clean cargo racks and attachment points thoroughly—these areas accumulate dirt that causes corrosion. Check load-bearing welds during cleaning. Models like the ENGWE LE20 Cargo have additional structural points that need inspection.
Maintenance Timeline for Different Conditions
Dry Conditions
Every 2-3 weeks: Light dust cleaning, chain lube check. Monthly: Full wash and inspection.
Urban Commuting
Weekly: Quick wash to remove road grime and pollution residue. Bi-weekly: Deep drivetrain clean.
Wet/Muddy Trails
After every ride: Immediate mud removal. 2-3 times per week: Full cleaning with complete drivetrain service.
Winter/Salt Exposure
After every ride: Salt removal is critical. Weekly: Full wash with extra attention to metal components. Monthly: Apply corrosion protection.
Storage Periods
Before storage: Deep clean, full inspection, protective coating. Every 4-6 weeks in storage: Check for moisture, inspect seals, test battery charge.
Essential Tools and Products for E-Bike Maintenance
Quality tools make cleaning faster and protect your investment. Here are products from our catalog that have proven invaluable in my maintenance routine.
38-in-1 Portable Bicycle Repair Tool Kit
What It Includes: Complete multi-tool set with hex keys, screwdrivers, spoke wrenches, chain breaker, and tire levers
Best For: Comprehensive roadside and home maintenance
This kit has everything you need for post-cleaning adjustments. I keep one at home and a smaller version in my saddle bag.
Compatible With: SHIMANO, SRAM, Avid, MAGURA brake systems
Essential For: Maintaining brake performance after washing
After cleaning, brakes sometimes need bleeding if moisture entered the system. This kit works across multiple brake brands—essential for serious maintenance.
Application: Professional bearing installation and removal for wheel hubs and frames
Build Quality: Heavy-duty construction for shop-level work
For riders who do their own maintenance, this tool handles bearing service when cleaning reveals bearing issues. Professional-quality at a fraction of shop prices.
Function: Laser-guided calibration and measurement adjuster
Precision: Ensures perfect alignment after maintenance
After deep cleaning and component removal, this tool ensures everything goes back perfectly aligned. Proper alignment prevents premature wear and improves handling.
Purpose: Measures spoke tension for wheel trueness
Build: Aluminum construction with digital readout
During cleaning, spin your wheels and check for wobbles. This tool measures spoke tension to diagnose wheel issues before they become serious problems.
Apply automotive-grade wax or bike-specific frame protectant after deep cleaning. This creates a barrier against dirt adhesion and UV damage. Focus on areas vulnerable to cable rub, rock strikes, and where your feet contact the frame.
Frame protection tape or helicopter tape on high-wear areas prevents paint damage. I learned this lesson after my first frame got scratched to hell from cable housing rubbing during wet rides.
Electrical Component Care
Apply dielectric grease to all electrical connections after cleaning and drying. This prevents corrosion and ensures reliable power delivery. Check manufacturer-specific recommendations for your motor system—Bosch, Shimano, and Bafang each have slightly different requirements.
Storage Conditions
Store your freshly cleaned e-bike in a dry location away from temperature extremes. Remove the battery and store it separately at room temperature. Extreme cold and heat degrade battery chemistry faster than normal cycling wear.
Pro Tip: I keep a maintenance log in my phone with photos after each cleaning. When something breaks or wears out, I can track exactly when issues started developing. This has saved me hundreds in unnecessary part replacements by catching problems early.
Troubleshooting Common Post-Cleaning Issues
Even with proper technique, occasional issues arise after cleaning. Here's how to address them based on my experience.
Squeaky Brakes After Cleaning
If brakes squeal after washing, you likely got soap or oil on the rotors or pads. Remove wheels, clean rotors with isopropyl alcohol, and inspect pads. If pads are contaminated, roughen them with sandpaper or replace them—there's no reliable way to fully decontaminate brake pads.
Chain Squeaking Despite Lubrication
You probably over-lubricated or didn't clean thoroughly before applying lube. Remove excess lube with a clean rag, then reapply sparingly. Remember: lube goes inside the chain rollers, not on the outside where it attracts dirt.
Display Acting Strangely
Moisture in the display connection is the usual culprit. Disconnect the display cable, dry both ends thoroughly with compressed air, apply dielectric grease, and reconnect. Let the bike sit in a warm, dry location for several hours before testing again.
Gears Shifting Poorly After Cleaning
Degreaser can remove lubricant from derailleur pivots and cable housings. Lightly lubricate all pivot points on both derailleurs. If cables feel sticky, they may need replacing—cleaning sometimes reveals wear you didn't notice before.
My Most Expensive Mistake: I once ignored a slight grinding noise after cleaning, thinking it was just a dirty bearing that would "work itself out." It was actually a damaged motor bearing that eventually failed catastrophically, requiring a $400 motor replacement. Never ignore new noises after cleaning—they're warning signs, not coincidences.
Seasonal Deep Cleaning and Storage
Preparing your e-bike for seasonal storage or bringing it back after winter requires extra steps beyond regular cleaning.
Pre-Winter Storage
Complete a thorough deep clean before storing your e-bike for winter. Apply extra lubricant to prevent moisture-related corrosion. Inflate tires to maximum pressure to prevent flat spots. Remove the battery and store it at 40-70% charge in a cool, dry location—never let batteries sit fully charged or depleted for months.
Post-Winter Revival
Inspect every bolt for rust or corrosion. Check brake cables and housing for fraying—winter storage accelerates cable wear. Test brake performance thoroughly before your first ride. Inflate tires to proper pressure and check for dry rot or cracking.
The first ride after storage should be a test ride in a safe area. Listen for unusual noises, test brakes multiple times, and verify all electrical systems function correctly before committing to longer rides.
When to Seek Professional Help
DIY maintenance saves money, but some situations require professional expertise.
Bring your e-bike to a qualified shop if cleaning reveals motor grinding noises, battery connection issues that don't resolve with cleaning, damaged frame welds or cracks, or significant play in headset or bottom bracket bearings. Hydraulic brake issues beyond simple cleaning should also be professionally diagnosed.
Most importantly, if you're ever unsure about whether damage is safe to ride on, stop. A professional inspection costs far less than medical bills from a preventable accident. I learned this after attempting to true a wheel myself and creating a dangerous wobble that nearly caused a crash.
Final Thoughts from a Decade of E-Bike Ownership
Proper e-bike cleaning isn't just about maintaining appearance—it's preventive maintenance that extends component life, maintains safety, and preserves resale value. The e-bikes I've cleaned regularly every week have consistently outlasted those I neglected by thousands of miles.
The initial investment in quality cleaning supplies and tools pays dividends through extended component life. My first e-bike received minimal cleaning and required component replacement every 500-800 miles. My current e-bike, with consistent weekly cleaning, sees components lasting 2,000+ miles routinely.
Start with a basic cleaning routine and gradually expand as you become more comfortable with maintenance. The most important step is simply establishing consistency—a quick 15-minute wash weekly prevents the need for hours of deep cleaning later.
Remember, your e-bike is a significant investment that deserves proper care. Treat cleaning as essential maintenance rather than an optional chore, and you'll enjoy reliable performance for years to come.
📥 Free Downloadable Resource
Get our comprehensive ebike cleaning and maintenance checklist you can print and keep in your garage!
Disclaimer: This guide provides general information about e-bike cleaning and maintenance. Always consult your specific e-bike manufacturer's manual for model-specific cleaning instructions and recommendations. Improper cleaning techniques can void warranties or damage electrical components. If you're unsure about any maintenance procedure, consult a qualified e-bike technician. Cleaning does not replace professional servicing for safety-critical components like brakes and steering systems. Never operate an e-bike that exhibits unusual behavior after cleaning without professional inspection.
Val is an e-bike specialist with over 10 years of experience riding, maintaining, and testing electric bicycles. At Glide Ebike, Val creates maintenance guides and content based on a decade of hands-on work with e-bike systems, having personally serviced and ridden dozens of different models.
With over 25,000 miles logged across various terrains and conditions, Val's recommendations come from real-world experience with what works—and what doesn't—in everyday e-bike ownership.